Add Apple Music to GarageBand – How to Do It

import-apple-music-to-garageband

As the famous music sequencer, GarageBand helps you record audios, edit MIDI, and serves as a virtual software instrument as well as guitar. You are able to create and make exclusive music and podcasts. To make your masterpiece on GarageBand, Apple Music is a good source as the music provider. So how to add Apple Music to GarageBand?

As a matter of fact, Apple Music is protected by its encoded format for digital right management. To get Apple Music for personal use on GarageBand, you are suggested to change the Apple Music songs’ format. What do you need? What can help you do the format conversion between Apple Music and GarageBand?

Best Way to Add Apple Music to GarageBand

DRmare Audio Converter is powerful enough to convert Apple Music tracks to the common audio format including MP3, FLAC, AAC, WAV, M4A and M4B. So you can upload the converted songs to GarageBand for your editing and playing. Most importantly, the converted Apple Music tracks are of no quality loss and also kept with ID3 tags. Then you do not need time for songs’ identification.

What’s more, you are allowed to customize the output parameters while you are using the DRmare software. Besides, you can import the Apple Music playlist to other music editors or players apart from GarageBand. It’s convenient to store the converted Apple Music songs.

How to Sync Apple Music to GarageBand

Now let’s figure out how to get Apple Music songs for GarageBand with the DRmare Audio Converter.

Step 1. Please install the DRmare Audio Converter on your Windows or Mac computer. Open it. On iTunes library, select the songs for the format conversion. Click the “Add File” button to add them to the DRmare window. Or you can drag them to the window directly.

Step 2. Hit the “Audio” icon on the right of the interface. Choose the output format and reset the channel, codec, bit rate and sample rate for better output quality. You are advised to select MP3, 48000 Hz, and 320 kbps.

Step 3. Press on the big pink “Convert” button to start the Apple Music conversion. The data of the songs like title, album cover, group, year, etc. Will be saved for you. After teh conversion is done, you can tap on the “Converted” button to locate the converted Apple Music songs on your computer.

Step 4. Now with all of the converted Apple Music songs on your computer, please follow the guide to add them to GarageBand.

For Macbook or Mac Desktop

  1. Launch GarageBand on Mac. Choose “Media Browser” to locate the Apple Music folder on your computer.
  2. Select the local computer folder option. Import the converted Apple Music songs to GarageBand.

For iOS Devices

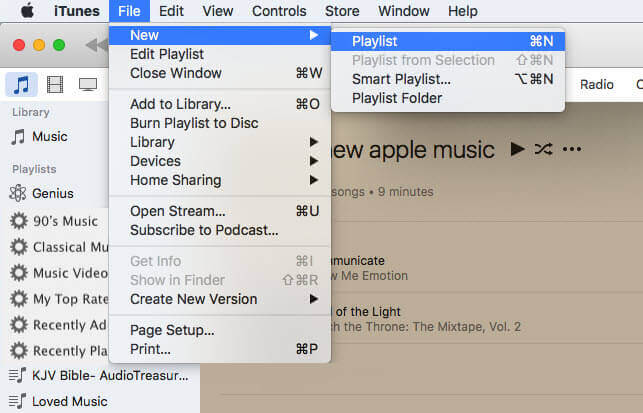
  1. Upload the converted Apple Music songs to iTunes. Choose the “iCloud Music Library” by clicking the “Edit” > “Preferences” option.
  2. Open GarageBand. Hit the “Loop Browser” icon and pick up the Apple Music songs which you like. Then at last, you can sync Apple Music to GarageBand for your editing or listening.


Add Apple Music to iMovie to Make Your Masterpiece

apple-music-on-imovie

Apple Music songs are a great source for listening on different platforms or use it for your entertainment. If you use iMovie to make videos in your daily life, you can think about adding Apple Music songs to iMovie to make your masterpiece. As Apple Music tracks are encoded for its digital management, you’d better convert Apple Music to iMovie for your video editing. For your personal use, the DRmare Audio Converter meets your need at a large extent.

Why You Need DRmare Audio Converter

Apple Music tracks are not compatible with iMovie. Even if you download the songs with your premium account, you are only allowed to access the songs inside the app. But to move them to iMovie, you need to change their format to common ones, like MP3. DRmare Audio Converter aims to convert Apple Music songs to MP3, FLAC, AAC, M4A, M4B, and WAV. After you get the converted Apple Music playlists, you are able to send them to iMovie for your videos.

Furthermore, the Apple Music songs which are converted are kept with no quality loss. The data of the songs including title, album cover, genre, year, etc. will be all preserved for you. Besides iMovie, you can also upload the converted songs to other video making software. Using the DRmare Audio Converter, you can gain the songs on Apple Music in a short time.

How to Convert Apple Music for iMovie with DRmare Program

It’s easy to finish the format conversion of Apple Music songs. Please follow the guide below to use Apple Music on iMovie.

  1. Install the DRmare Audio Converter on your computer. Open it. Select the songs from the iTunes library for conversion on the new windows. Click the first “Add Files” button on the DRmare interface to load them. Or you can drag them to the DRmare window directly.
  2. Hit the “Audio” icon on the right of the bottom. Choose one format you want. Also, please reset the channel, codec, bit rate and sample rate to get better quality. Find the “Preference” option on the upper right, you can archive the output tracks by Artist or Album.
  3. Tap on the big “Convert” button to let the conversion begin. You can locate the converted Apple Music files in the history folder on your computer. The title, year, genre, and other data of the Apple Music tracks will be saved for you.
  4. When the conversion is finished, move the converted Apple Music files to the iTunes library. Then launch iMovie on your phone. Open your project. Choose the “Add Media” button and press on the “Audio” menu. Select iTunes and pick the songs you want. You can preview the songs and then click the “Use” icon to put Apple Music on iMovie for your editing.


Play Apple Music on Android TV – Best Way

apple-music-on-android-tv

Want to play Apple Music on Android TV? Android TV is designed with user-friendly interface and aggregated contents from different media apps. If you have placed it in your house, playing Apple Music songs is a good choice to relax.

Get Apple Music on Android TV Directly

Actually, you can install the Apple Music app on your Android TV through Google Play. Then you are able to listen to Apple Music songs with your Apple account on your TV. Or you can stream the Apple Music tracks via Chromecast. Firstly, ensure that Chromecast, Android TV and smartphone work with the same Wi-Fi. Next, play Apple Music on your phone. Then hit the song which is playing from the bottom of the screen. Open Now Playing page. Finally, select Cast icon> Cast to Living Room TV.

With the two methods above, you can get Apple Music playlist on your Android TV for listening. But if there is no network connection, it may become troublesome. Moreover, you have no way to control the music playing with Siri on your phone.

Stream Apple Music on Android TV in A Perfect Way

Now you are offered a best tool to unlock these limitations. DRmare Audio Converter can help you upload Apple Music directly to Android TV. It converts the songs from Apple Music and download them as MP3 or other common audio files. So you can send the songs to the TV for playback with ease. What’s more, you are inspired to customize output parameters of Apple Music tracks.

Surprisingly, you can move the converted Apple Music playlist not only to Android TV but also to any other apps or devices. Let’s see how to add Apple Music songs to Android TV now.

  1. Install the DRmare Audio Converter on your computer and open it. Select the songs from iTunes library and drag them to the conversion window.
  2. Click the “Audio” button on the bottom. Choose the output format and set the channel, codec, bit rate and sample rate for better quality.
  3. Press on the “Convert” icon on the right of the bottom. The DRmare Audio Converter will download the music files from Apple Music to your computer.
  4. After you convert all of the Apple Music songs, you can transfer them to the USB drive. Then insert the UAB drive to Android TV. Or you can send them to Google Play on your Android TV. So you can play Apple Music on Android TV in the end.


Burn Apple Music Songs to CD ? Done!


apple-music-2

Can you burn Apple Music songs to CD?

As you know, Apple Music needs a subscription if you want to save them for listening. But you are only allowed to play the songs on its app. When you try to move them to your app or other devices to edit or stream, you may probably get disappointed. Therefore, Apple Music tracks are not available to be used for your CD.

What You Need to Burn Apple Music to CD

But you will have a chance if you own a DRmare Audio Converter. The DRmare tool is well-designed for you to convert Apple Music songs to common audio formats like MP3, FLAC, AAC, WAV, M4A and M4B. You can select MP3 as the new format. Then you can send the songs of Apple Music to CD with no limitation. Most importantly, the converted music is kept with no quality loss. All of the ID3 tags of the songs are preserved so you can identify them easily on your computer.

Detailed Steps to Burn Apple Music to CD

Songs from Apple Music can be quickly converted when you use the DRmare Audio Converter. You just need to do some clicks to download the tracks. The whole operation guide is as below. You can follow it to finish the process. At last, you can save the Apple Music tracks and burn them to CD.

  1. Download and launch the DRmare Audio Converter on your computer. You will see the new window of the iTunes app. Here you should choose the songs for CD burning. Drag them to the conversion window. Or just copy the song’s link and drop it to the search bar. Click the “+” button to load it.


  1. Find the icon “Preference” on the top. Select MP3 as the output format. Also, set the channel, bit rate and sample rate. If you plan to change the folder of output files, hit the “Converted” button on the bottom. To make the conversion process more stable, you can tap on the “1X” option.


  1. Drop your mouse on the “Convert” icon. The DRmare Audio Converter will begin to download the songs from Apple Music. You will find them in the output folder on your computer. Then you can burn them to CD.


  1. Open the iTunes app. Go to ‘File’ > ‘New’ > ‘Playlist’. Create a new playlist for the converted Apple Music songs. Insert a blank disc into your computer disc driver. Choose the Apple Music playlist. Right-click it. Select ‘Burn Playlist to Disk’. Pick a disc format on the new window. Hit  ‘Burn’ to burn the Apple Music songs to your CD.

8MI@S[XCF59D%(SXND4I